Everything happens in the same plan. You just switch the view.
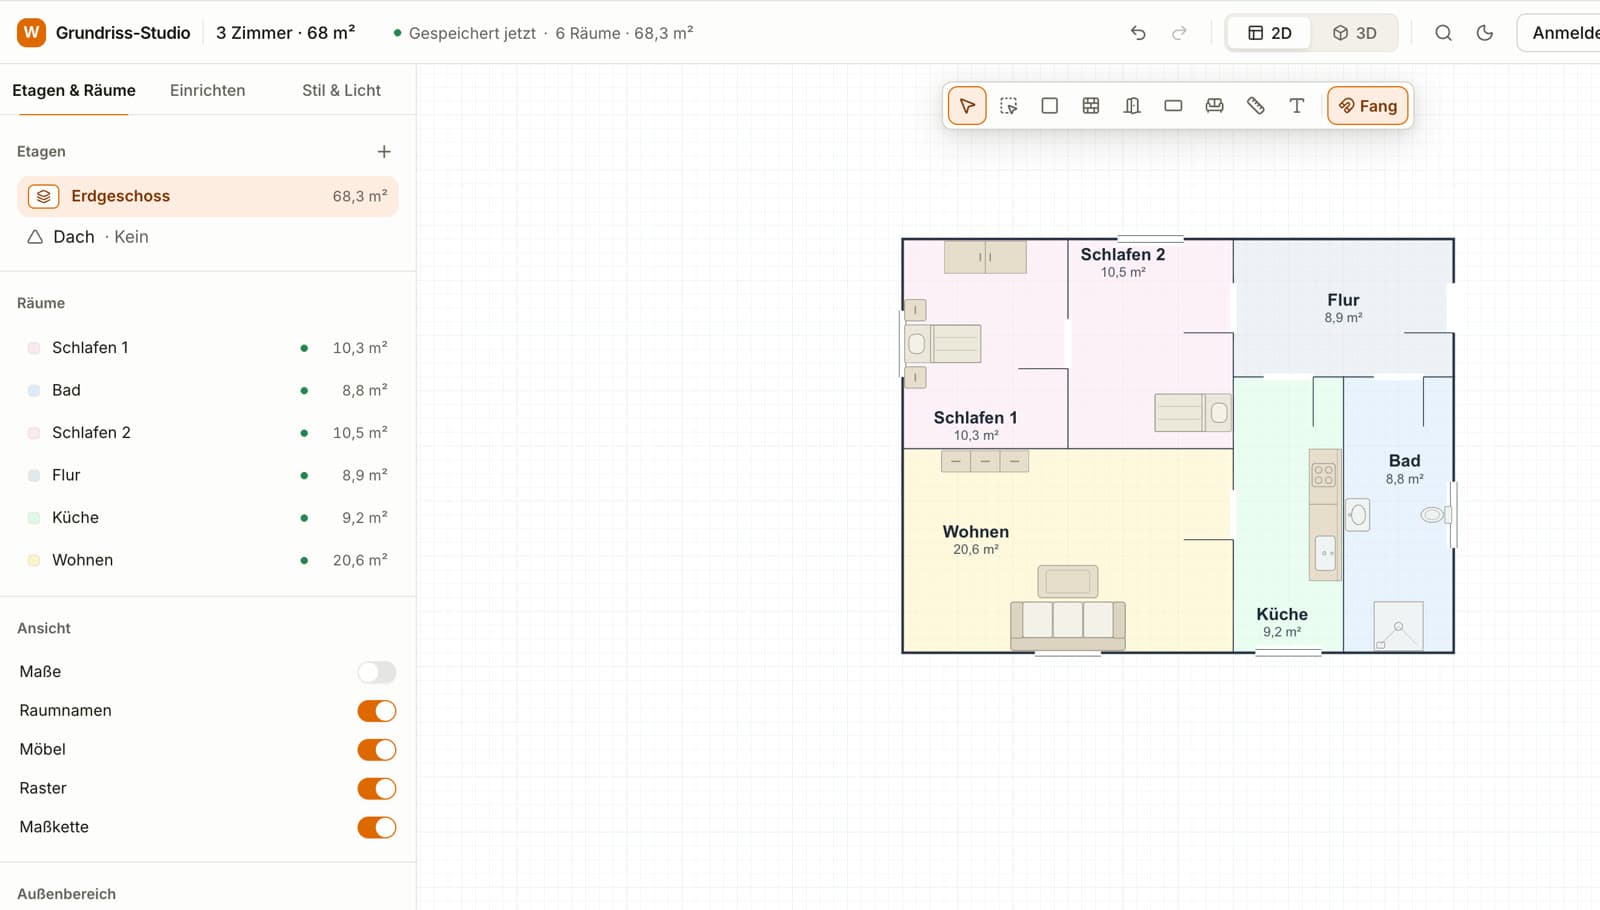
01 · Draw
Drag out rooms, type in measurements, done.
Start from a template or a blank sheet. Walls snap into place, you type lengths directly, and closed walls automatically become a room with its area.
Living area
live per room, per WoFlV or DIN 277
14 room types
from bathroom to staircase
7 types
doors, sliding doors, floor-to-ceiling and roof windows
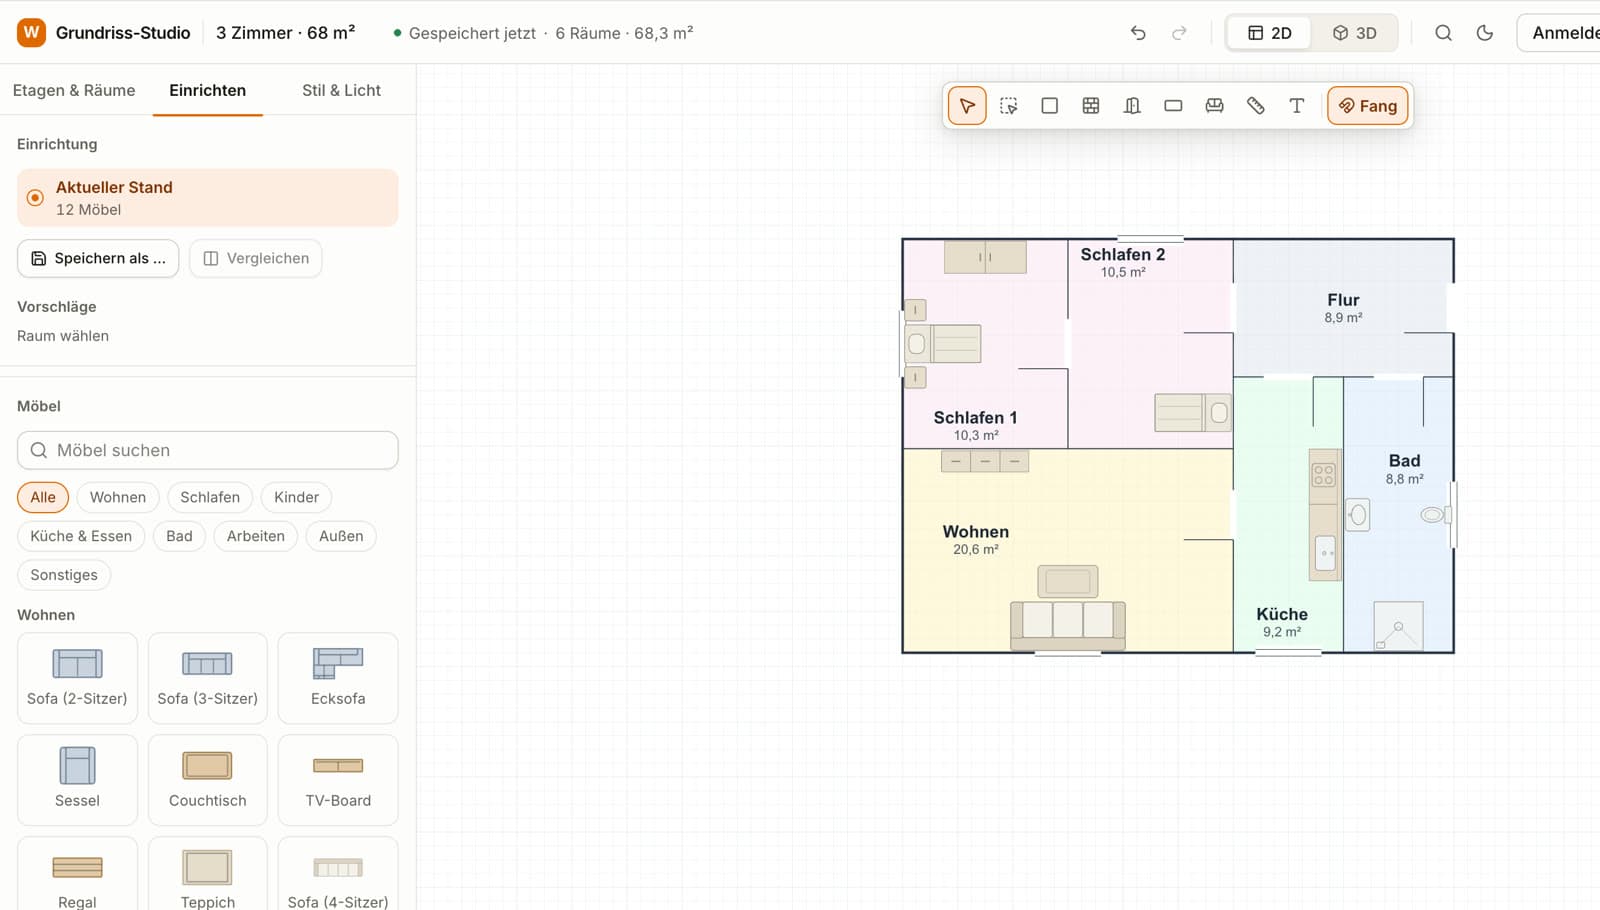
02 · Furnish
Place furniture, or let the room furnish itself.
Drag a sofa, bed and kitchen from the catalogue into the room. Or furnish a room automatically and pick one of up to three layouts.
151 items
true to size, in 2D and 3D
Suggestions
up to three layouts per room
Variants
save furnishings and compare them side by side
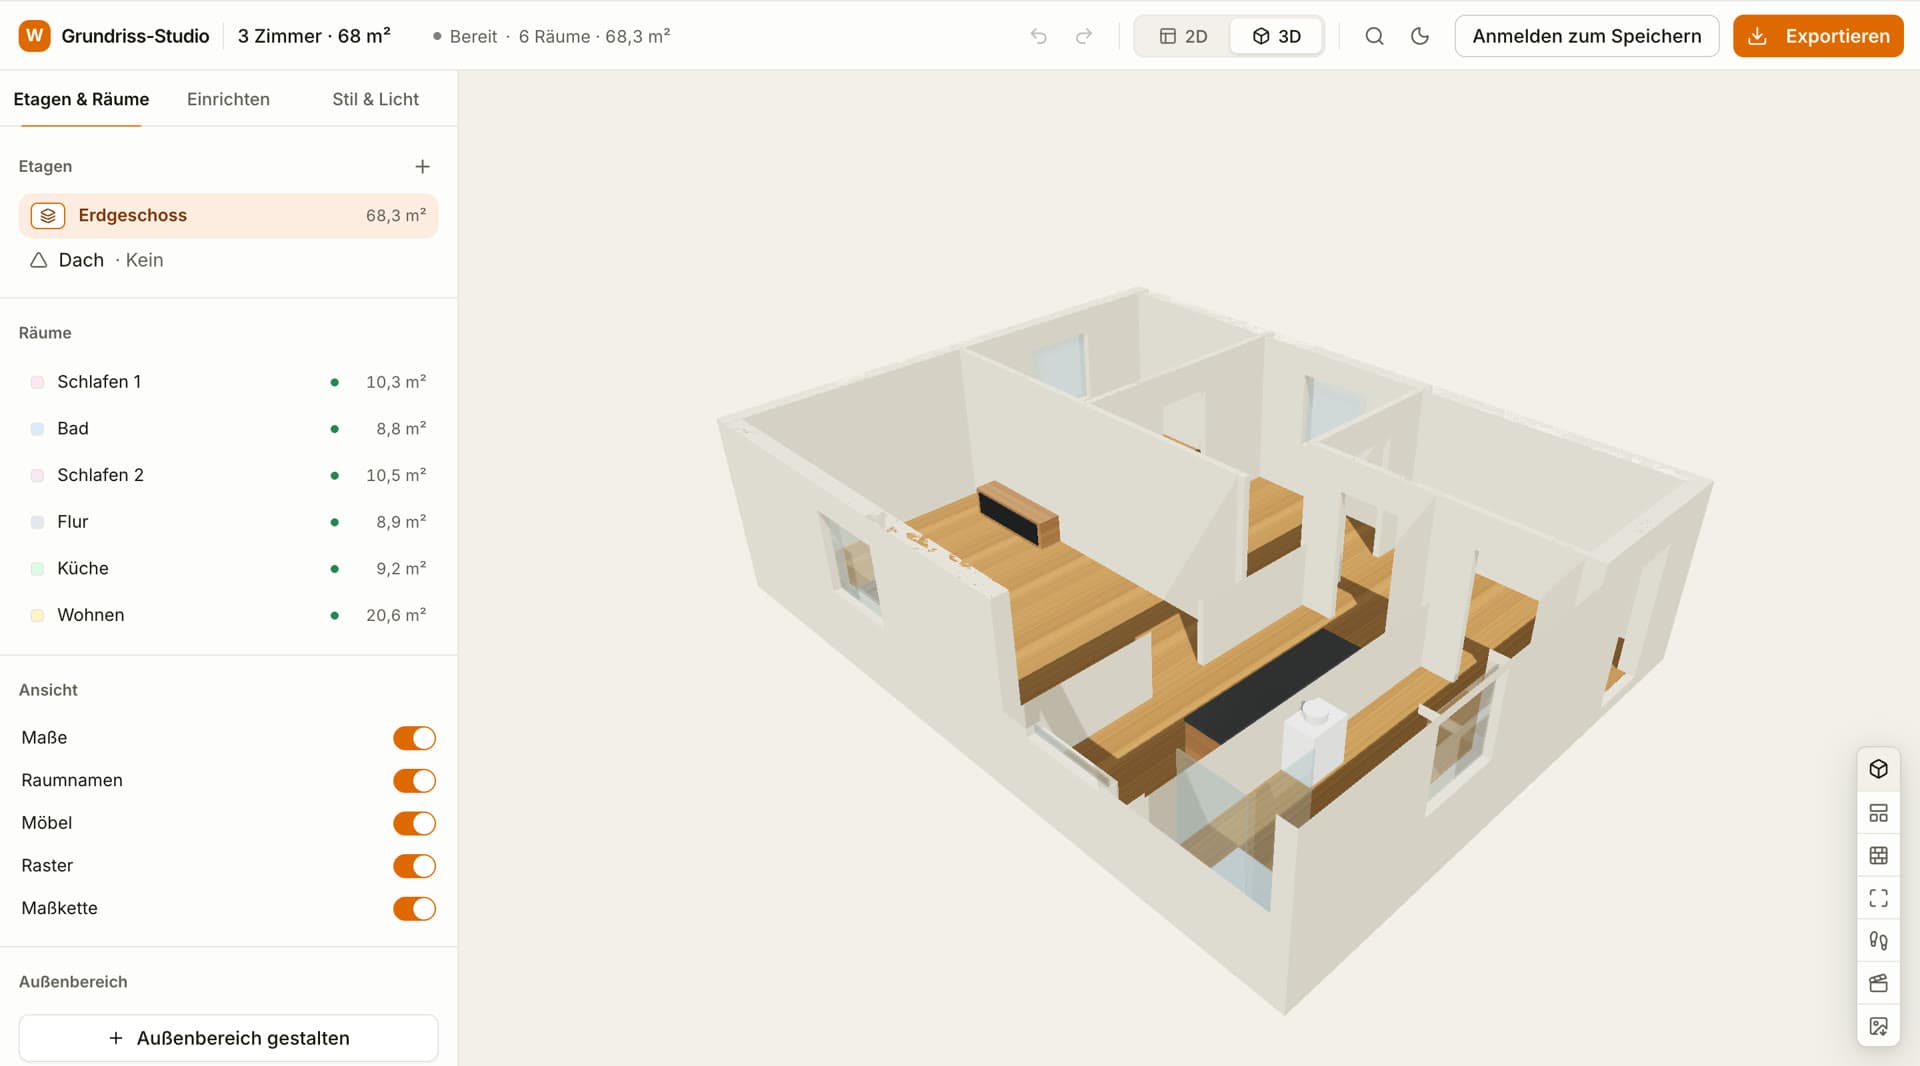
03 · Walk through
One click on 3D, and you're standing in your apartment.
The walls rise out of the plan. Rotate the model, look from above or start a walkthrough: at eye level through the rooms, doors open at the press of a key.
Walkthrough
with WASD or arrow keys, walls stop you
Camera tour
an automatic tour through every room
Whole house
all floors stacked, with roof
WASD
Walkthrough · Open doors with E
04 · Share
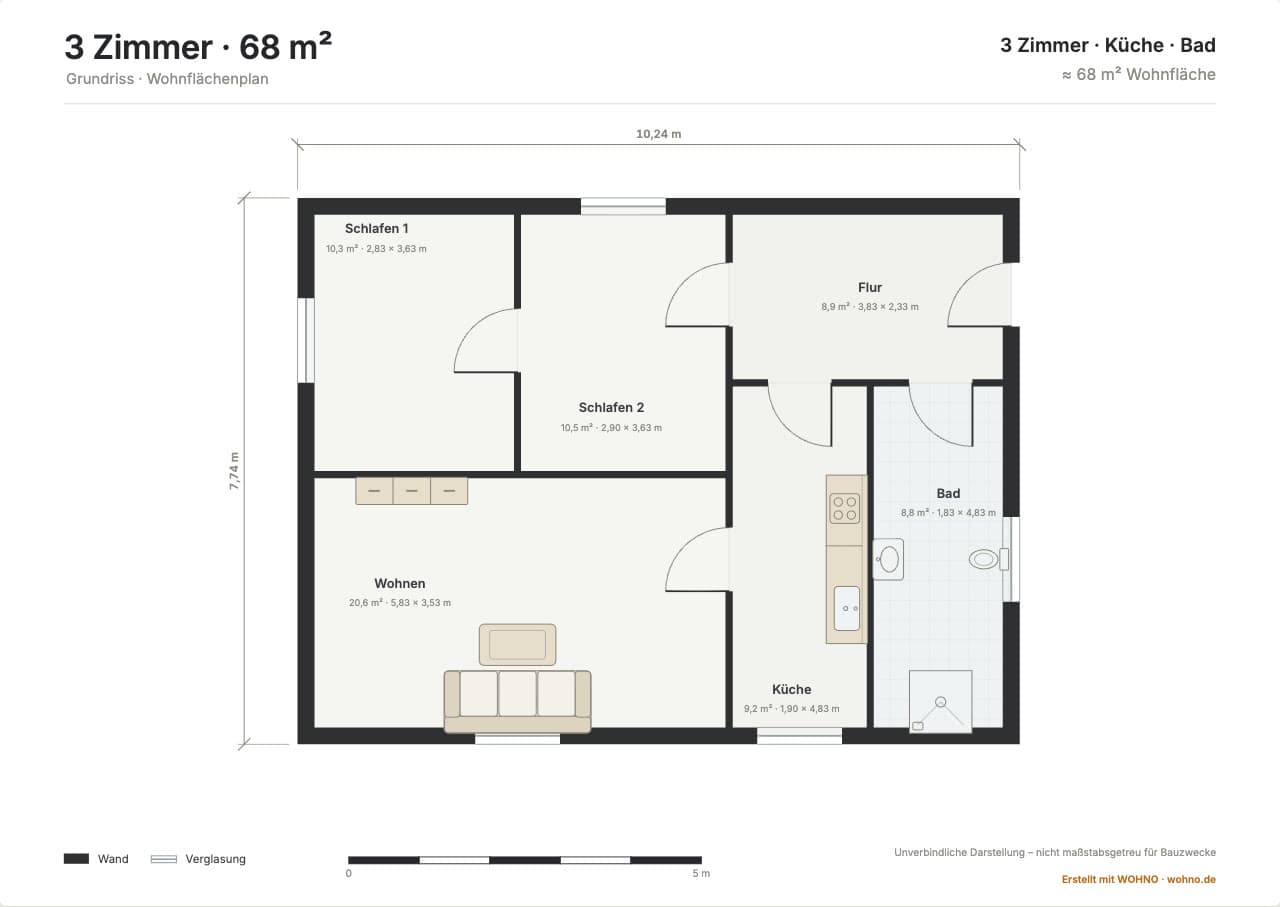
A plan that looks good in any listing.
Export a presentation plan on landscape A4: room areas, dimensions, legend, scale bar. As PDF, PNG or SVG, by email or straight into your WOHNO listing. Plus a 3D image of your apartment as PNG.
PDF · PNG · SVG
print-ready, no watermark
3D image
1920 px, 3840 px with an account
Free
Draw, furnish, view in 3D: no account needed.
The floor plan studio is free, with no subscription and no trial period. You can start right away. You only need a free account for the extras below, such as keeping your plans permanently.
A free account adds
Keep plans permanently, on every device
Upload a photo of a floor plan: walls and rooms are detected
3D image in HD (3840 px)
Your own furniture across devices
Add the plan to a listing in one click
3D view and walkthrough
Furniture catalogue and auto-furnish
Multiple floors with roof
Living area per WoFlV or DIN 277
Export as PDF, PNG and SVG
Watermarknone, just a small footer
More features
For houses, renovations and gardens too.
Up to eight floors
Add floors, duplicate them and show the one below dimmed. No account needed.
Sloped ceilings per WoFlV
Flat, shed, gable, hip or mansard roof: from pitch and knee wall, the studio works out which area counts fully, half or not at all.
Plan a renovation
Mark walls as existing, to be demolished or new, and compare before/after including the living area.
Garden and balcony
Terrace, lawn, pool, hedge or parking space: the plan doesn't end at the outside wall.
Bring in a paper plan
Upload a photo of your paper plan and walls and rooms are detected. With a free account.
Floor, wall and fabric
14 materials from oak to velvet, one click on floor, wall or furniture and visible in 3D.
For everyone who wants to see their rooms first.
Landlords & agents
A clean floor plan with living area for your listing, plus a 3D image that shows prospects the rooms before they visit.
The floor plan studio is your free starting point. With WOHNO, the finished plan lands in your listing in one click, and applications arrive with a complete application folder.
How to draw a floor plan: a clean result, step by step
A convincing floor plan doesn't happen by chance; it comes together in clear steps. This guide shows you how to draw a floor plan in the floor plan studio, from preparation through the first wall to the finished export for your property listing. You don't need a CAD degree: a tape measure, a few minutes, and the right order are enough.
Before you start drawing
The best floor plan doesn't begin on screen; it begins in the apartment. Spend a few minutes preparing and you'll draw the whole thing in one go, instead of stopping to re-measure three times. Three things should be ready before you open the studio.
First, the measurements: measure every room and note its length and width. A laser distance meter is the most convenient, but a plain tape measure works just as well. Second, a rough sketch on paper, a quick freehand outline showing which room borders which. That sketch is your map while drawing. Third, a room list of every space that should appear on the plan: living room, kitchen, bathroom, bedroom, hallway, storage room.
With these three building blocks, drawing becomes pure transcription. You no longer have to invent any measurements; you simply reproduce what's on your notes. That's exactly what separates a guessed floor plan from a reliable one.
Tip: photograph your paper sketch with your phone before you begin. That keeps it within reach while you draw, even when the note itself disappears under the keyboard.
Six steps to your floor plan
The order makes the difference. Set the rough outline first and work your way inward, and you'll save yourself later corrections. Here's how to build a clean floor plan step by step in the studio:
1
Pick a template or draw the outer walls
Start from a template or the outline of the apartment. Draw the outer walls along the actual measurements; the studio snaps to the grid and to corners, so right angles line up automatically. The outer outline is your frame, and everything else fits inside it.
2
Add inner walls and split the rooms
Divide the area into individual rooms with inner walls. Follow your sketch and work from the large rooms to the small ones. Room by room, a complete floor plan takes shape.
3
Name the rooms
Give every area a name: living room, bathroom, bedroom, hallway. Labelled rooms make the plan instantly readable for prospects; an unnamed box only raises questions.
4
Place doors and windows
Position the doors on the right walls and mark the windows in the outer walls. Mind the swing direction of each door so every room stays realistically usable and no one has to guess which way a door opens.
5
Add the dimensions
Add dimension chains for walls and rooms. Now anyone can see at a glance how wide a room is, and the plan looks professional rather than estimated. In a listing, that builds trust.
6
Check the living area and export
Check the calculated area per room and in total, compare it against your measurements, then save the finished plan as an image or PDF. A clean export at good resolution looks more credible than a photographed paper plan.
Measuring rooms correctly
Before you draw, you need real measurements. Measure every room wall to wall, ideally with a laser distance meter, or with a tape measure and a second pair of hands. Note length and width at the widest point each time, and stick to one unit so no errors creep in when you transfer the numbers.
Don't forget alcoves, bays and recesses: they count towards the area and change the plan noticeably. Also measure the position of doors and windows along the wall so you can place them in the right spot later. A room is rarely a perfect rectangle. The more precisely you capture corners and offsets, the less you'll need to correct in the studio.
Measure carefully and you'll save yourself a second trip to the apartment. Record every value in one pass, and at the end check whether the parts add up to the full length of a wall. That catches transposed digits immediately.
Tip: measure once too often rather than guessing in the studio. For hard-to-reach spans, such as across furniture or in tight alcoves, a laser distance meter is more reliable than a sagging tape measure.
Measurements and dimensioning
A floor plan is only as good as its measurements. Always draw to scale rather than sizing walls by eye; otherwise the proportions are off and the living area comes out wrong. In the studio you type lengths directly in metres, so a four-metre wall is twice as long as a two-metre wall.
The outer dimension chain is switched on with a toggle, and it appears in the export too. Which scale makes sense for a printout, and how to use standardised symbols for doors, windows and stairs, is covered in the in-depth guide.
Doors and windows turn a box sketch into a real floor plan. Stick to common sizes: interior doors are usually around 0.80 to 0.90 metres wide, and windows typically sit between 1.00 and 1.40 metres in height. Millimetre precision is rarely needed for a listing. What matters more is that position and swing direction are right, so the room stays usable.
Dimension chains round out the picture: a continuous chain along the outer wall shows the overall length, while individual measurements break down the rooms. It looks professional and answers a prospect's most common question, how big the room really is, without a single follow-up. Small details like a hinted stair symbol or a marked balcony make the plan even easier to read.
Tip: place doors exactly where they actually are and set the swing direction to match. A viewer can tell at once whether a room is laid out sensibly and whether the sofa fits against the wall they have in mind.
Furnishing and placing furniture
An empty floor plan shows areas; a furnished one shows how an apartment can be used. In the “Furnish” tab you'll find 151 items true to size, from beds and kitchen units to showers. Drag an item into the room, rotate it with Q and E and align it to the wall; the studio shows the distance to the wall live.
It's quicker with “auto-furnish”: pick a room with a room type and the studio places a matching basic set of furniture. Under “Suggestions” you get up to three layouts for the same room and keep the one you like. You can save several furnishings side by side and compare them.
Tip: Measure your key pieces of furniture beforehand and adjust width and depth in the studio. That way you'll know before the move whether the sofa really fits against that wall.
Viewing your floor plan in 3D
A 2D floor plan shows dimensions; a 3D model shows how the space feels. At the top of the studio you switch from 2D to 3D: the walls rise out of your plan, with doors, windows and furniture in place. “Overview” shows the apartment as a dollhouse from above at an angle; “Walkthrough” lets you walk through the rooms at eye level. You move with W, A, S, D or the arrow keys and open doors with E.
For listings, a 3D image is worth adding: it shows prospects at a glance how the rooms connect. Export it as PNG and upload it together with the floor plan.
Multiple floors and sloped ceilings
For a house or maisonette, add more floors in the floor list, up to eight and no account needed. You can duplicate a new floor from an existing one, and the floor below is shown dimmed so walls and staircase line up. In 3D, “Whole house” shows all floors stacked.
You choose the roof once for the whole house: flat, shed, gable, hip or mansard, with pitch and knee wall. From that, the studio calculates the living area under sloped ceilings per the German WoFlV. Areas under one metre of ceiling height don't count, those between one and two metres count half.
Stating the living area correctly
The living area is the number prospects look at first. In Germany it's usually calculated under the Living Space Ordinance (Wohnflächenverordnung, WoFlV); sloped ceilings, balconies and terraces only count proportionally. The studio calculates per WoFlV or DIN 277, takes sloped ceilings into account and gives you a reliable reference value.
That total is a good orientation, but no substitute for your own paperwork. The final, binding figure for a listing should always be checked against your tenancy agreement, purchase contract or an existing living-area calculation. Especially with slopes and outdoor areas, the exact treatment can differ.
Most failed floor plans trip over the same small things. Run through these points once more before you export:
Not drawn to scale: walls sized by feel instead of by measurement make every area figure useless.
Duplicated walls: overlapping or doubled walls distort the area and look messy.
Doors or windows forgotten: a room with no visible openings looks unfinished and unsettles prospects.
Alcoves and slopes ignored: round them away and you end up stating the wrong living area.
Rooms left unnamed: a plan of nameless boxes forces the viewer to guess.
No clean export: a pixelated screenshot devalues even the best plan; export as an image or PDF instead.
Go deeper
This guide shows the practical path in the studio. For standards details, symbol catalogues and the exact living-area calculation, there are separate in-depth guides. Draw here, read up there:
WOHNOYes. 3D view, walkthrough, furniture catalogue, floors and export are free, with no subscription and no trial. There's no watermark, just a small footer “Created with wohno.de” on the exported plan.
Do I need to sign up?
WOHNONo. You start right away and your plan is saved automatically. With a free account you keep it permanently; your draft is transferred automatically when you log in.
Does it work on a phone?
WOHNOTo draw you need a tablet or computer (from 768 px screen width). On a phone you can view and download your plan.
How accurate is the living area?
WOHNOThe studio calculates every room area exactly from your measurements, per the German Living Space Ordinance (WoFlV) or DIN 277, including sloped ceilings. How accurate the result is depends on your measurements. For contracts, the official living-area calculation always applies.
Can I draw multiple floors?
WOHNOYes, up to eight floors, no account needed. You draw staircases as a room, and in 3D you see the whole house stacked, with a roof if you like.
Can I upload a paper plan?
WOHNOYes, with a free account. Upload a photo or scan (PNG, JPEG or WebP). Walls and rooms are detected, and the photo stays underneath as a reference.
Which formats can I export?
WOHNOThe floor plan as a presentation plan on landscape A4: as PDF, as print-resolution PNG or as SVG. Plus a 3D image as PNG. You can also send the plan to yourself by email.
What happens to my data?
WOHNOWithout an account your plan is stored anonymously, with no name and no email address. Anonymous plans that haven't been edited for 90 days are deleted. We only use your plans to provide the studio's features; details are in our privacy policy.
Your floor plan in 2D and 3D.
Pick a template or start with a blank sheet. Free and without sign-up.
When you visit any website, it may store or retrieve information on your browser, mostly in the form of cookies. This information might be about you, your preferences or your device and is mostly used to make the site work as you expect it to. Learn more
These cookies are required for the website to function and cannot be disabled. They are set when you log in, submit forms, or perform other website actions.
These cookies enable enhanced features such as language settings, theme preferences, and personalization. Without these cookies, some features may not be available.
These cookies help us understand how visitors interact with our website — via our own first-party analytics and Google Analytics. The data is collected in pseudonymised form and helps us improve our offering.
These cookies are used to personalize advertising and display relevant content. They may be set by us or our advertising partners.